Practical Guides for Restaurant Success
Learn the exact steps to build your menu, invite your team, print high-quality QR codes, and connect custom domains.
Invite team members & manage roles
Prerequisites
Owner or Manager role level.
Step-by-step setup instructions
Navigate to the "Team Management" page under Settings in the admin panel.
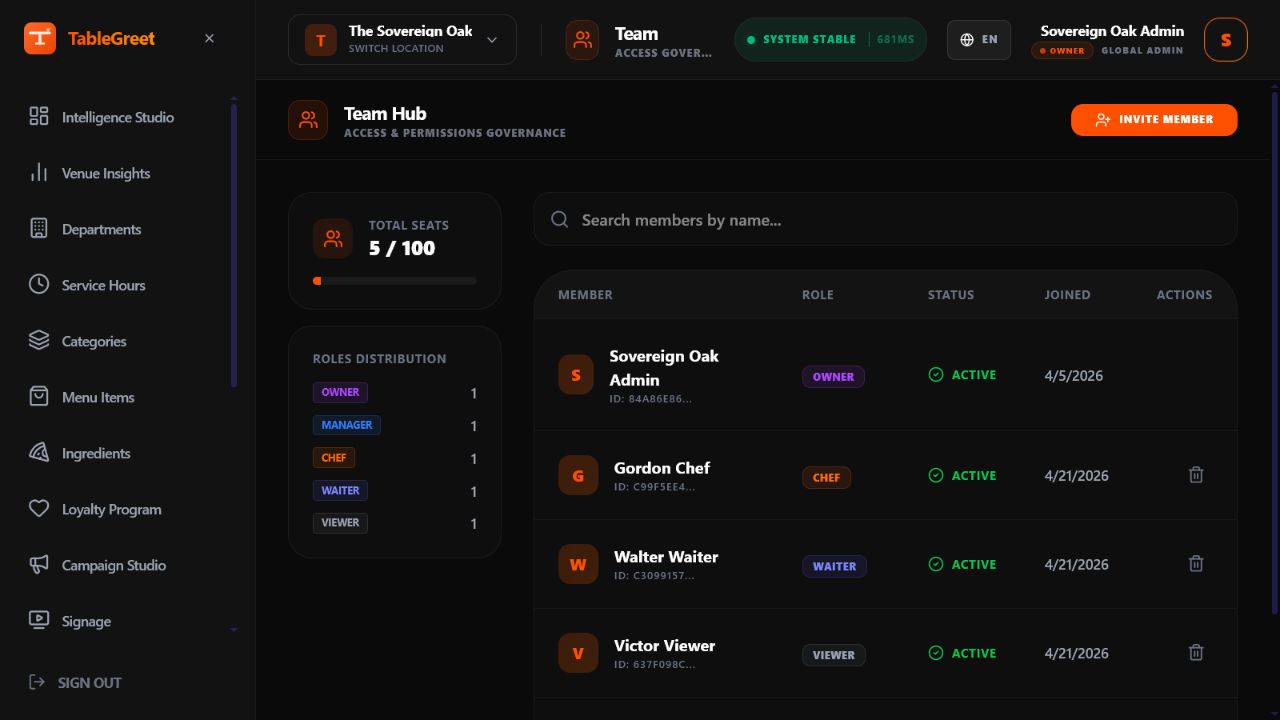
Click the "+ Invite Member" button at the top right.
Input the recipient's professional email address and select their functional role: Manager, Chef, Waiter, or Viewer.
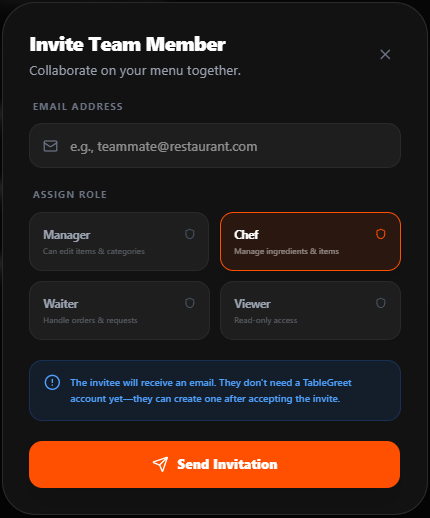
Click "Send Invitation Link". The team member will receive an email containing a secure authorization link to create their credentials.

Manage role permissions (RBAC) to govern access controls: configure permissions for category editing, price overrides, live stock toggles, and billing visibility.
Pro Tip
Keep Price Overrides disabled for the Waiter role to prevent unauthorized bill changes during busy floor shifts, and always use active individual email addresses for accurate audit tracking.
Still need help?
Connect with our technical support team to resolve complex DNS connections, SSO configuration, or layout adjustments.